適用產品:Vates XCP-ng 8.2.x
本文說明如何建立VM。
注意
- 如尚未匯入ISO檔,請先閱讀”003_Vates_XOA_如何匯入ISO檔”。
- 單台VM上限,XCP-ng支援配置:
- vCPU最高32個。
- GPU最高8個。
- RAM最高1.5 TB。
- vDisk(含CD-ROM):總最高241個,使用VHD格式驅動(vDisk建立存放於Local EXT, Local LVM, NFS, LVM over iSCSI, XOSTOR)最高2.04 TB。
若使用raw disk 或實體磁碟,則無容量上限,相對無快照與即時遷移等進階功能使用。 - vCD-ROM Drivers:1台。
- Network:可配置最高7個NIC。
- USB裝置:最高6個。
以上數值須依據OS支援此配置上限,如超出OS支援限制,將會導致效能使用下降。
須依據OS相關更新以提高使用XCP-ng之數值上限配置。
支援OS
Windows:
| Windows | 32-bit:8.1、10 64-bit:8.1、10 |
| Windows Server | 64-bit:2012、2012 R2、2016、2019、2022 |
Linux:
| AlmaLinux | 8、9 |
| CentOS | 7、8、Stream 8、Stream 9 |
| CoreOS (Container Linux) | |
| Debian | Jessie 8.0 Stretch 9.0 Buster 10 Bullseye 11 Bookworm 12 |
| Gooroom Platform | 2.0 |
| NeoKylin Linux Server | 7 |
| Oracle Linux | 7、8、9 |
| Red Hat Enterprise Linux | 7、8、9 |
| Rocky Linux | 8、9 |
| SUSE Linux Enterprise | 64-bit:15 |
| SUSE Linux Enterprise Desktop | 64-bit:12 SP3、12 SP4 |
| SUSE Linux Enterprise Server | 64-bit:12 SP3、12 SP4、12 SP5 |
| Scientific Linux | 7 |
| Ubuntu | Xenial Xerus 16.04 Bionic Beaver 18.04 Focal Fossa 20.04 Jammy Jellyfish 22.04 |
操作步驟
Step. 1
至XOA的”+ New”選擇”VM”,選擇要建立VM的Host。
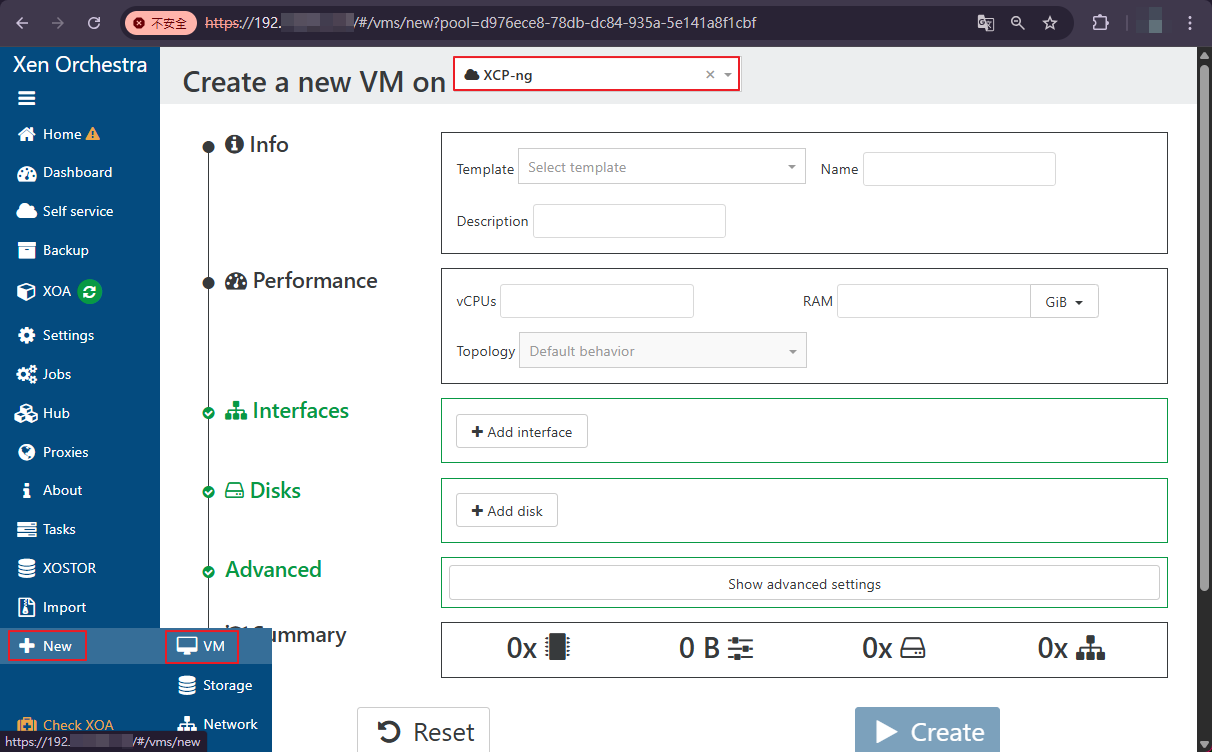
Step. 2
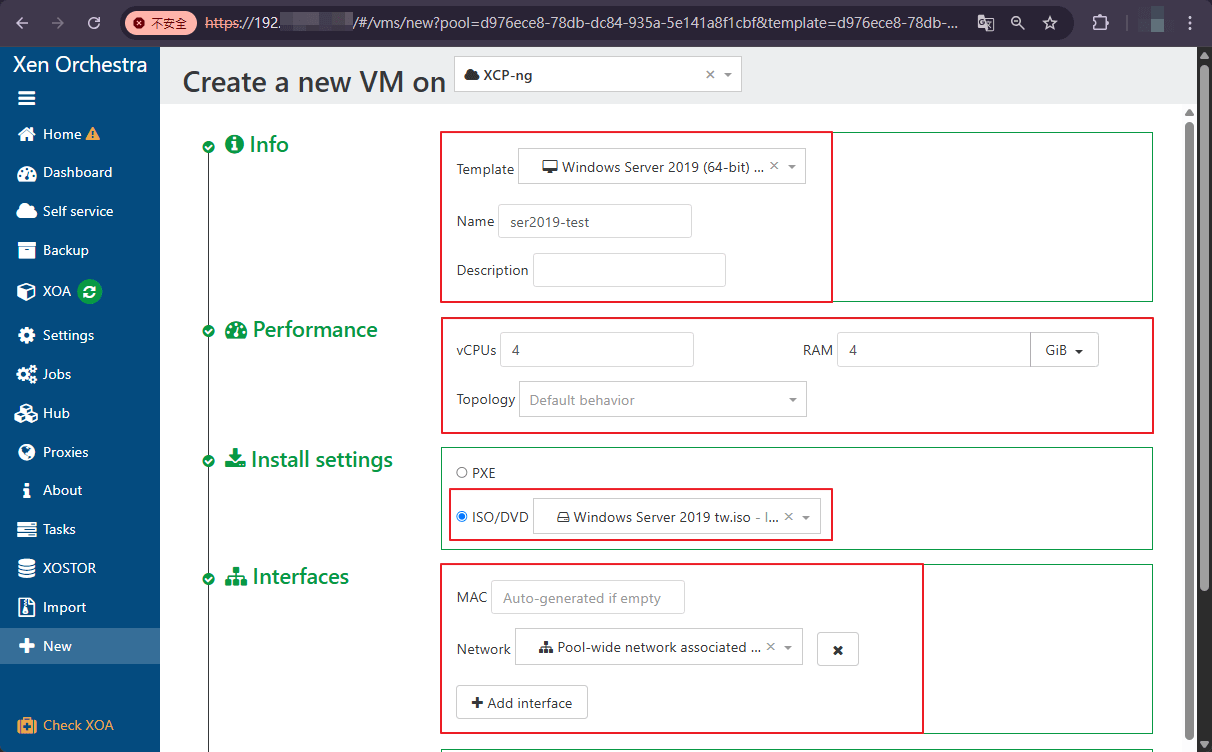
依據下列內容進行設定:
- Info-Template:選擇要建立OS的範本。
- Info-Name、Description:建立VM名稱,可編輯描述說明。
- Performance:依據VM要配給的資源需求進行配置。
- Install settings:選擇要建立的OS ISO檔,可選擇PXE。
- Interfaces:選擇要通訊的NIC網路,可自訂MAC位址。
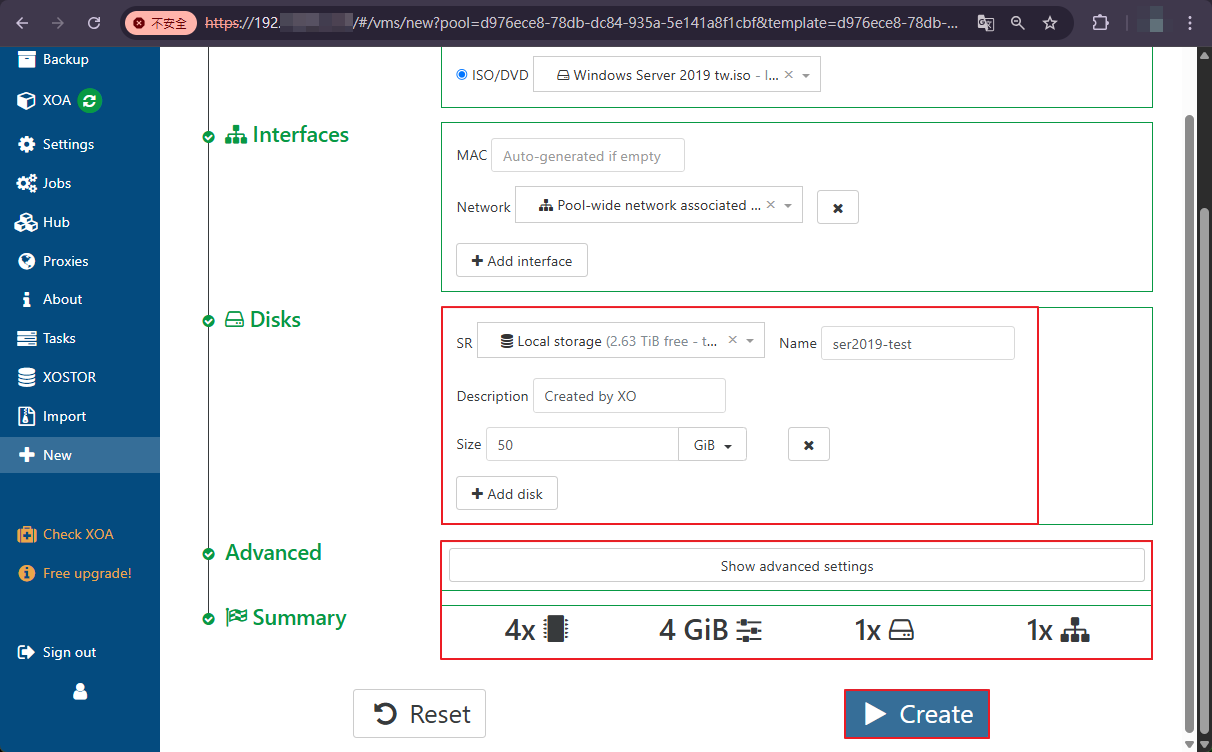
- Disks-SR:選擇要存放VM建立 Disk的Local Storage區。
- Disks-Name、Description:建立Disk名稱,可編輯描述說明。
- Disks-Size:依據VM要配給的空間大小需求進行配置。
- Advanced:若有設定效能與配置等進階需求,可Detail設定。
確認配置與Summary資訊正確後,點擊”Create”按鈕建立VM。
Step. 3
建立後顯示VM相關資訊,或是從HomeVMs點擊該VM。
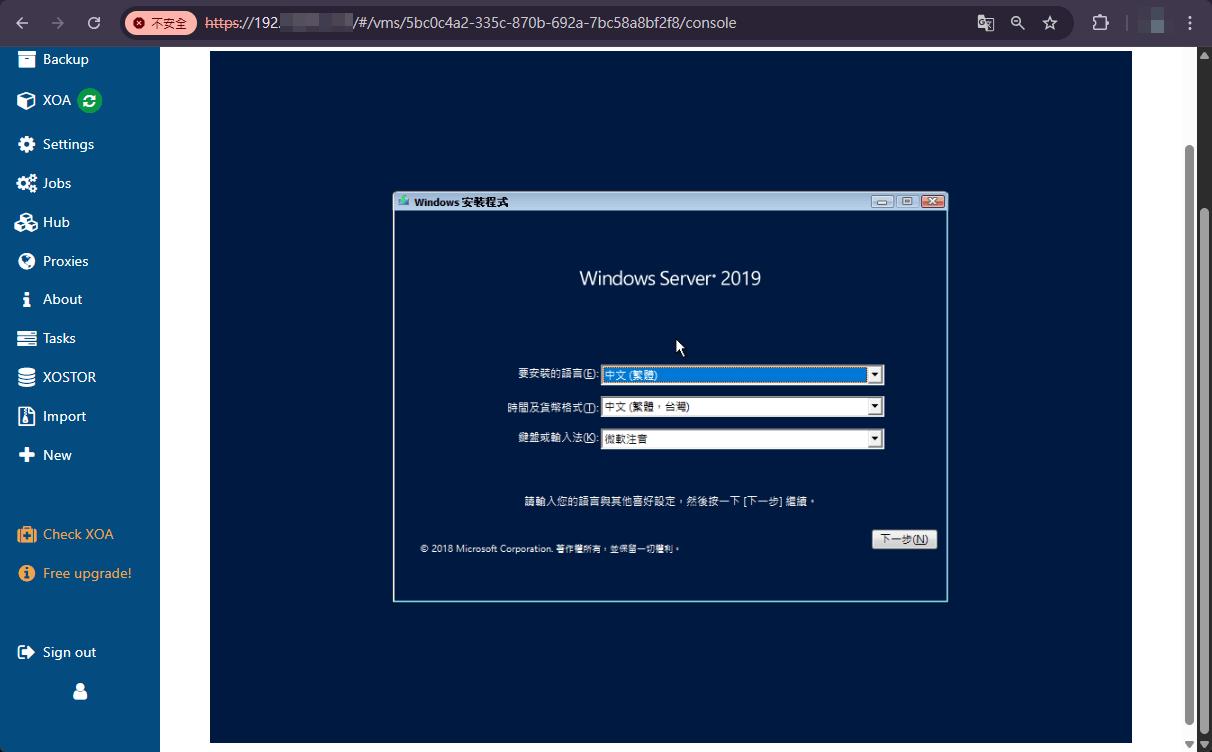
選擇”Console”。

Step. 4
當顯示開機畫面後即可如OS操作進行。